The Core Playbook: Mastering the Sweep-to-Mean Reversal
If you only learn one setup using Elev8+, make it this one.
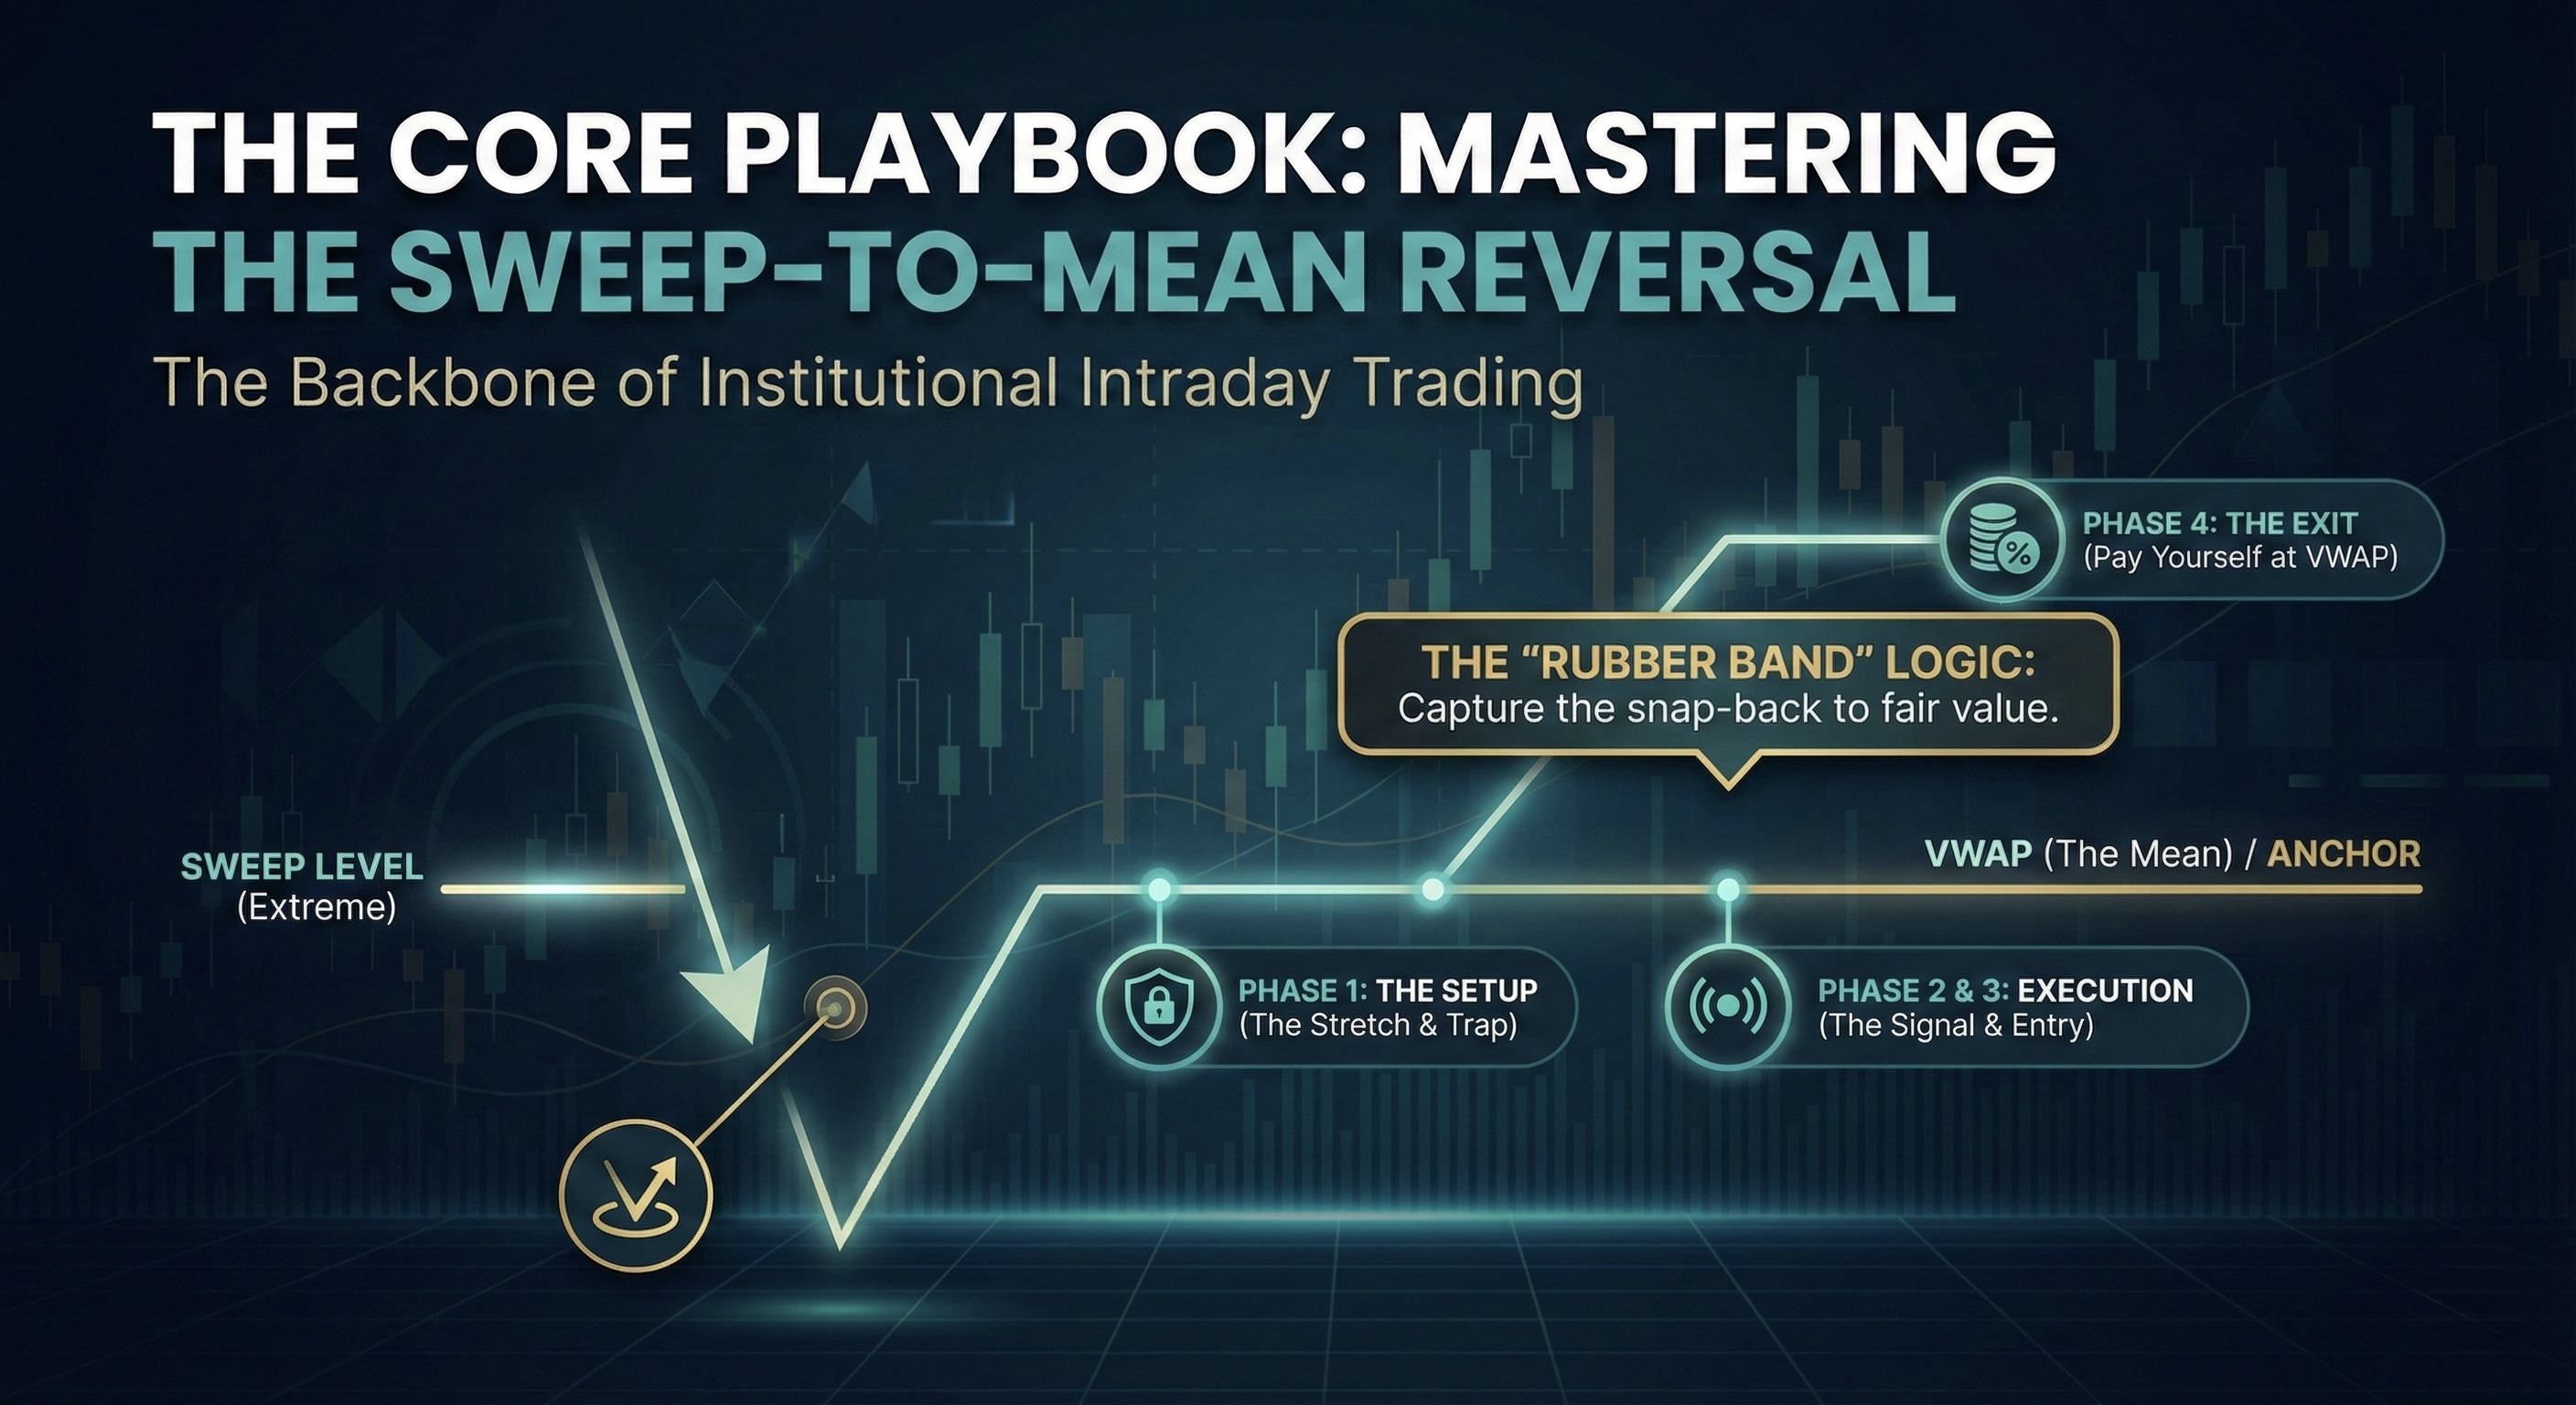
The Sweep-to-Mean is the backbone of institutional intraday trading. It is built on a simple premise: Liquidity is harvested at the extremes (the Sweep), and inventory is then rotated back to fair value (the Mean). This guide combines the entry signals, risk models, and targeting rules into a single execution playbook.
How the 4-Indicator Suite Improves This Setup
You can trade this playbook with Elev8+ Pro alone, but the highest-quality executions come from confluence across the suite. Think of it like this:
- Elev8+ Pro tells you when (Triangle/LS confirmation at the level).
- Market Map tells you where (the most important magnets/structure and session context).
- Market Extremes tells you if it’s a boundary (asymmetric reversal location vs mid-range chop).
- Momentum Gaps tells you the path (clean rotation objectives and gap/inefficiency fills).
Important: you don’t need every layer for every trade. Start with Pro, then add one context layer at a time as your clarity improves.
The "Rubber Band" Logic
Think of VWAP (Volume Weighted Average Price) as an anchor. When price stretches too far away and hits a Sweep Level, the rubber band tension peaks. Elev8+ identifies the "snap" point. Your trade captures the move back to the anchor.
Phase 1: The Setup (The 3-Step Sequence)
A valid Sweep-to-Mean trade always follows this specific order. If one step is missing, there is no trade.

Price must aggressively run into a Tier 1 Level (PDH, PDL, or Session Extreme).
Note: If price is just chopping in the middle of nowhere, ignore it.
Optional confluence: Market Map helps confirm the level is a true magnet (not a random pivot), and Market Extremes helps confirm you’re at a boundary where reversals are more asymmetric.
A candle pierces the level but closes back inside the range. This creates a long wick, proving that breakout traders are trapped.
An Elev8+ Signal (Triangle or LS) prints on the rejection candle.
Phase 2: Choosing Your Weapon (Triangle vs. LS)
You will see two types of signals on your chart. Knowing how to use each is critical.
Role: Raw Detection.
Frequency: High.
Use Case: Triangles are great for awareness, but they require you to manually verify the level.
Rule: Never take a triangle unless it is at a key level or has confluence with the other indicators.
Role: More Confirmation.
Frequency: Lower.
Use Case: These signals have stricter internal filters for volatility and volume.
Rule: Use the Liquidity sweep box as your safety zone or for possible re-entry when price comes back to it.
Suite note: Triangles/LS are your timing. Use Market Map and Market Extremes to validate location, then use Momentum Gaps (or VWAP) to define a realistic rotation objective.
Phase 3: Execution (The Entry & Stop)
Once the signal candle closes, you must execute without hesitation.
- The Entry: Enter on the Open of the very next candle. Do not wait for a retrace; you might miss the snap-back.
- The Stop Loss (Hard Rule): Place your stop 1-2 ticks beyond the Sweep Wick.
Why this stop placement?
If price breaks the Sweep Wick, the "Trap" has failed and the breakout is real. You want to be out immediately. This gives you a tight, defined risk on every trade. For more advanced users, you can use a manual stop loss, and only exit the trade if a candle actually closes through the wick extreme but you must be disciplined.
Phase 4: The Exit (Pay Yourself)
Do not always hold for a home run. We are trading a rotation, not a trend.
- Target 1 (The Mean): Take 50-75% of your position off at VWAP. This is where the "Rubber Band" tension reaches zero.
- Target 2 (The Runner): Leave the to see if price rotates to the other side of the range (e.g., PDL to PDH) and put your original stop loss to break even or in profit.
Optional confluence: Momentum Gaps can help you map “rotation checkpoints” on the way to VWAP (gap fills / inefficiencies). This keeps your exits structured instead of emotional and allows you to trail your stop loss behind new FVG's and impulse gaps formed in your direction.
The 2R Minimum
Before entering, look at the distance to VWAP. Is it at least 2x your risk? If your Stop is 20 points away, but VWAP is only 10 points away, skip the trade. The math doesn't work.
Phase 5: When to ABORT (The Safety Filters)
Even if the signal prints, stand down if you see these "Red Flags":
- The "Trend Day" Rail: If the EMA Ribbon is steeply angled and price has not touched VWAP in hours, do not fade it unless sweeping an extreme level providing good Risk vs Reward. The rubber band might snap you.
- The "Ugly Wick": If the rejection candle has a huge body and a tiny wick, it's not a trap. It's indecision.
- The "News Bomb": If it is 8:30 AM or 2:00 PM EST, wait 15 minutes for the smoke to clear.
Optional confluence: If Market Extremes shows you’re in the middle of the range (not at a boundary), be more selective. The Sweep-to-Mean works best when the sweep occurs at a meaningful edge, not in mid-range chop.
Summary: The Playbook Checklist
- Price hits a Core Six Level (PDH/PDL, Asia or London High/Low).
- Candle pierces & closes back inside (The Wick).
- LS or Triangle confirms the reversal.
- Risk Check: Distance to VWAP is > 2x the distance to the Wick.
- Execute: Enter next open, Stop at Wick, Target VWAP or next key level of liquidity.
- Market Map: Is this sweep happening at a true HTF level?
- Market Extremes: Are we near a boundary (best) vs mid-range chop (skip/size down)?
- Momentum Gaps: Is there a clean rotation path/target on the way to VWAP or fighting against gaps?
This strategy is repeatable, objective, and mathematically sound. Stop trying to catch every move. Master the Sweep-to-Mean, and you master the market's daily rhythm.