The Elev8+ System: Stacking the Odds
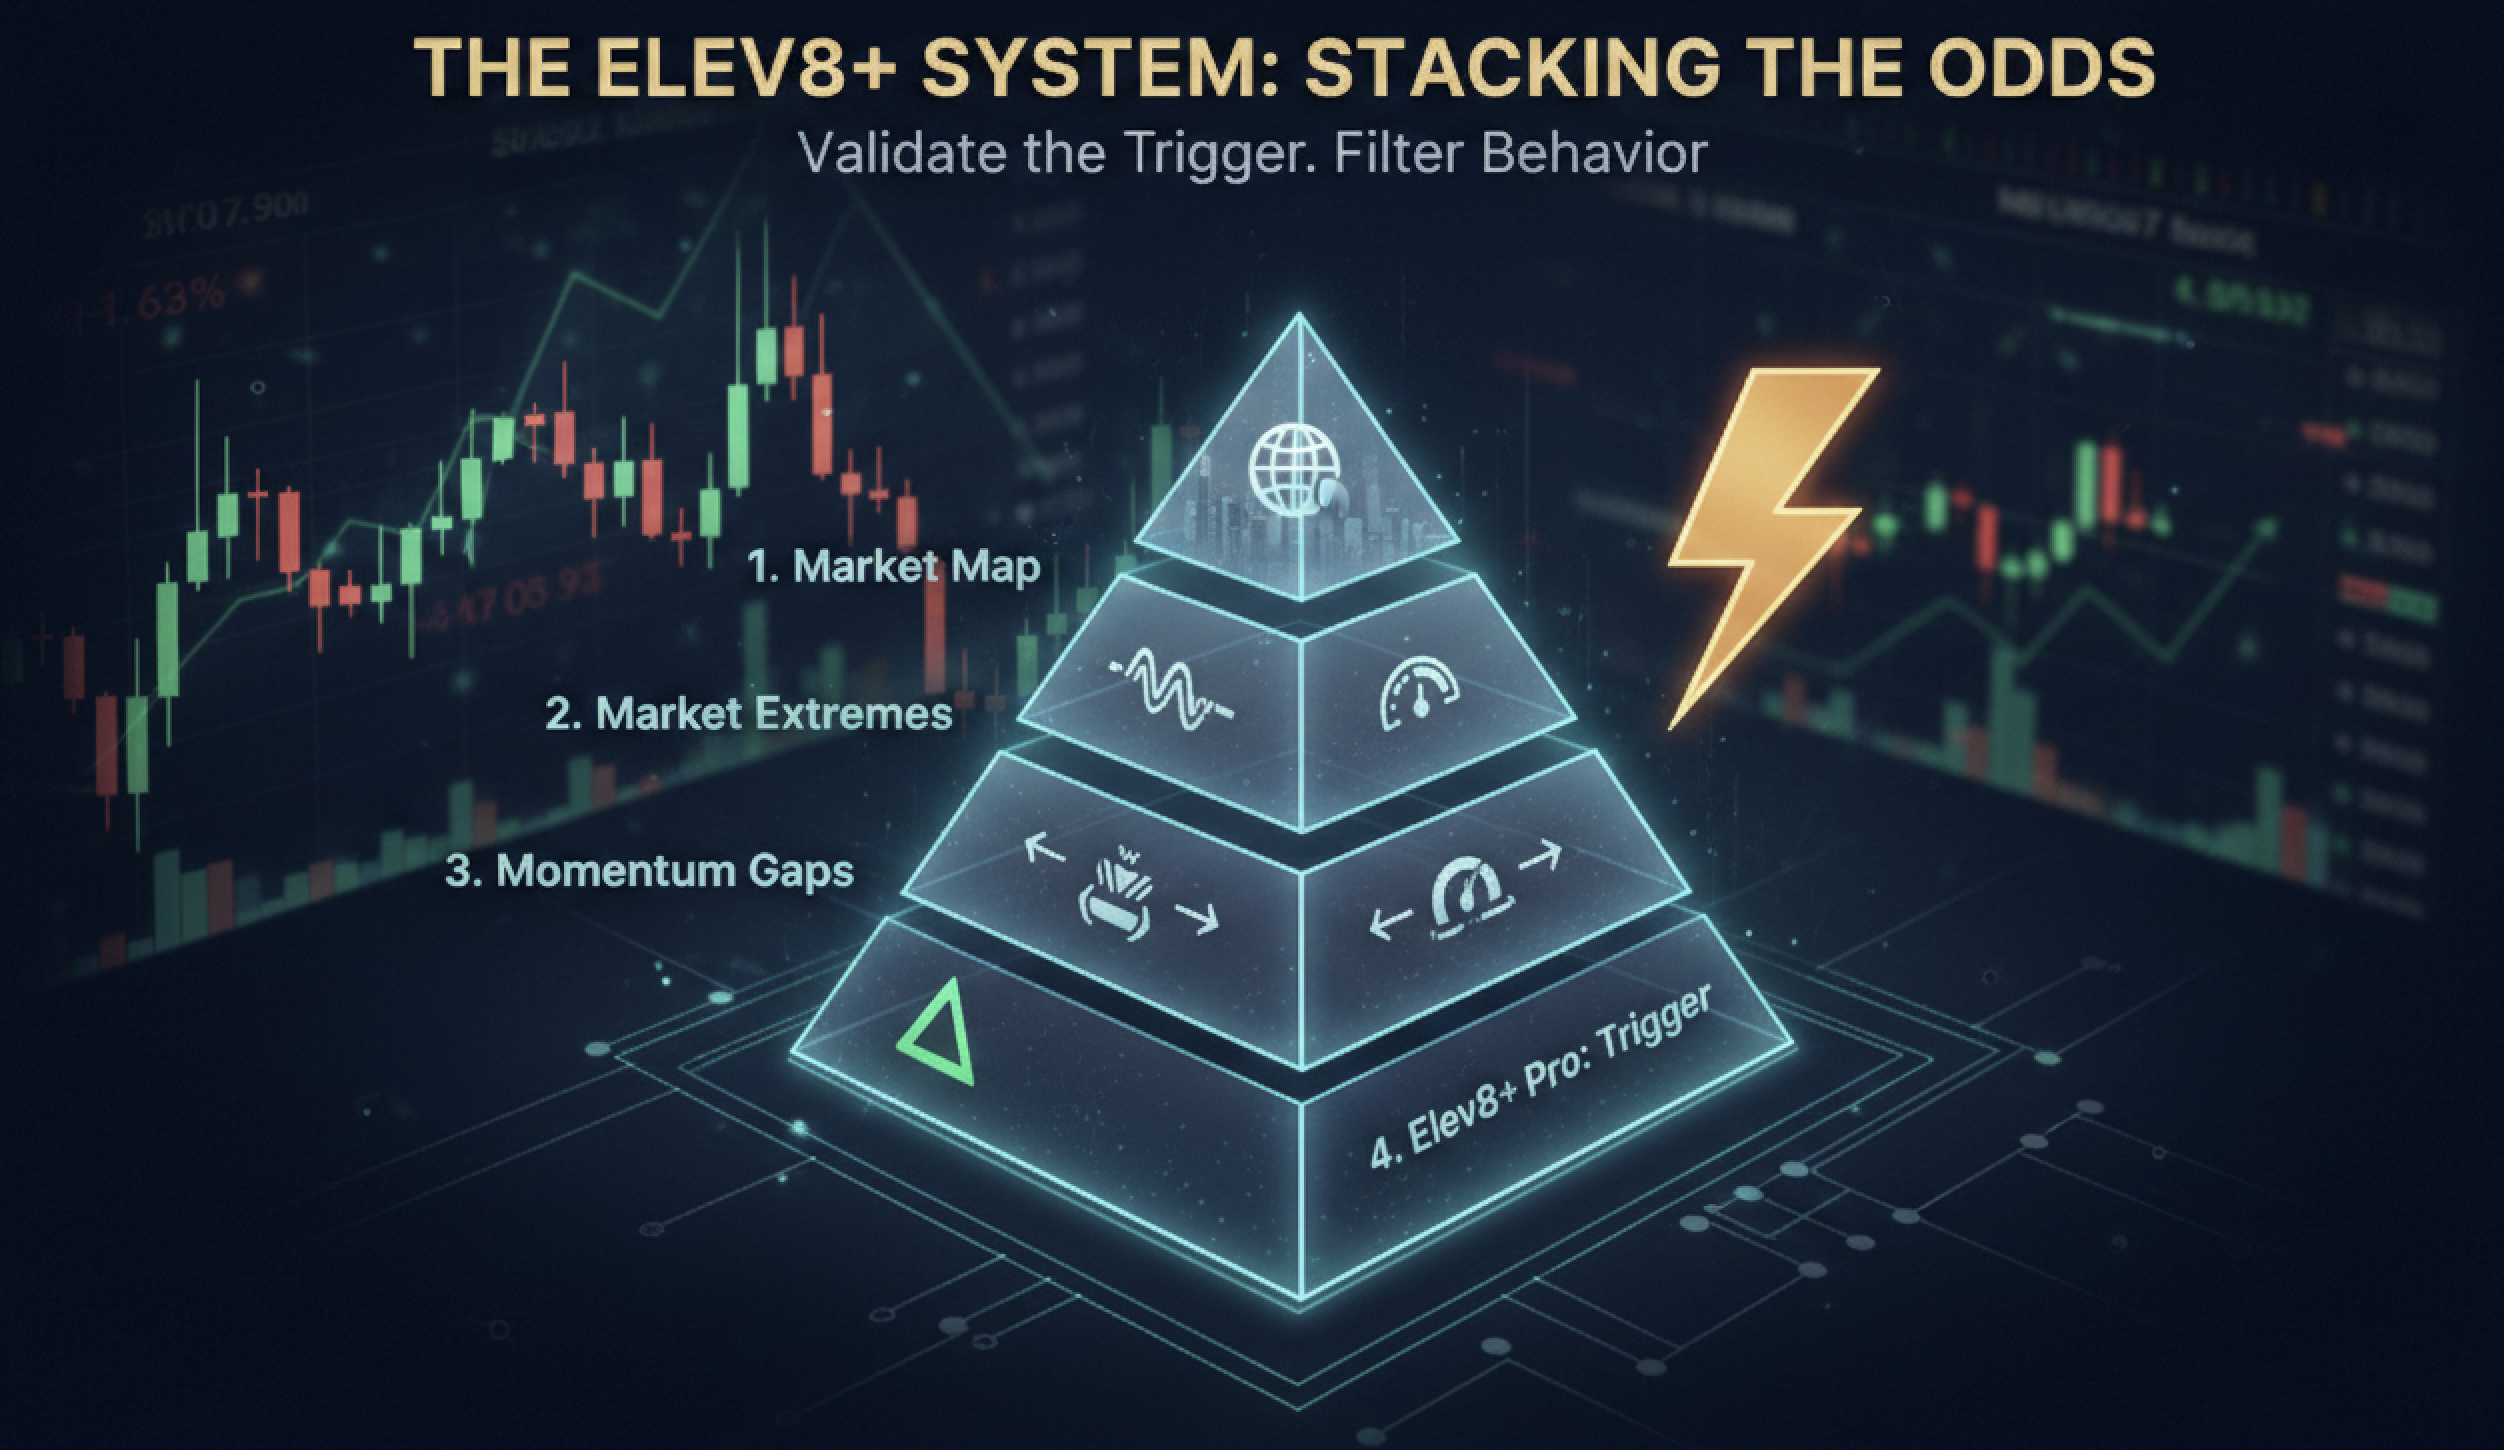
An Elev8+ Pro triangle signal is the trigger, not the entire strategy. To trade with professional consistency, you must validate that signal against the specific layers of our suite. Use this 5-point checklist to filter out noise and execute only on high-quality confluence.
1. Market Map: The "Where" (Structure & Liquidity)
Before you even look for a reversal, where are we on the map? We do not trade in the middle of nowhere. We wait for a reaction at a key liquidity tier provided by the Market Map overlay.
- Session Highs/Lows: Did price sweep an extended Asia or London session high/low?
- PDH/PDL: Are we reacting to the Prior Day High or Low ("Line in the Sand")?
- ORB Structure: Are we retesting a 15m NY Opening Range breakout or failing back inside the box (ORB Trap)?
2. Market Extremes: The "When" (Exhaustion & Timing)
Is the move actually stretched, or are you fading strong momentum? Use Market Extremes to confirm that the push has hit a statistical wall.
- 3SD Price Walls: Is price tagging a Red (Premium) or Green (Discount) 3-Standard Deviation wall?
- Exhaustion Index: Is the index reading above 80 (Buyer Exhaustion) or below 20 (Seller Exhaustion)?
- Divergence: (Bonus) Do you see a momentum divergence line printing against price?
3. Momentum Gaps: The "Why" (Impulse & Imbalance)
High-quality reversals often start from areas where institutional money previously stepped in. Use Momentum Gaps to identify these "footprints."
- Impulse/FVG Retest: Is price re-entering a fresh Impulse Zone or Fair Value Gap?
- Confluence Zones: Are we rejecting a "Confluence Zone" where an Impulse and FVG overlap?
- IFVG Flip: Did price reclaim an Inverse FVG (failed gap) to confirm a change in state?
4. Elev8+ Pro: The "Trigger" (Execution)
Once the Context (Map), Timing (Extremes), and Location (Gaps) align, then you look for the execution signal.
- Triangle/LS Signal: Do you have a confirmed Reversal Triangle or LS (Liquidity Sweep) label?
- Wick Rejection: Is the signal candle showing a clear wick rejecting the zone?
5. Invalidation (Risk Management)
A valid setup always has a clear point where it is wrong. If you cannot define it, you are guessing.
- Is your stop placed clearly behind the Session High/Low, Impulse Zone back-wall, or Sweep Candle?
- Is there clear room to the next target (e.g., Session Midline or opposite ORB level)?
Pro-Tip: The "4-Factor" Rule
Don't force it. The highest probability trades happen when you have at least one factor from each layer:
(1) Market Map Level + (2) Extreme Wall + (3) Impulse Zone + (4) Pro Trigger.